Free Shipping to Contiguous 48

Home  |  DIY Methods  |  DIY Cleaning Methods for Game controllers

DIY Cleaning Methods for Game controllers

  • Reviewed by Zac Kieffer

Updated: September 15, 2025

Discover easy DIY cleaning methods for game controllers. Keep your devices spotless and working smoothly with these simple, effective cleaning tips.

DIY Cleaning Methods for Game controllers

Isopropyl Alcohol and Cotton Swabs

Dampen a cotton swab with isopropyl alcohol and gently clean around the buttons, joysticks, and seams of your game controller. The alcohol quickly dissolves grime and evaporates without leaving residue, making it safe for electronics.

Title


What You’ll Need:


  • Isopropyl alcohol (at least 70%) – This is a common cleaning agent that evaporates quickly and doesn’t leave much residue. It’s often used for electronics because it dries fast and doesn’t usually harm plastic or rubber.
  •  
  • Cotton swabs – These are handy for getting into the nooks and crannies of your game controller, especially around buttons and seams.
  •  
  • Microfiber cloth – For wiping down larger surfaces and picking up dust or smudges.
  •  
  • Toothpick or soft brush (optional) – For loosening debris from tight spots before you go in with the swab.


How to Clean Your Game Controller with Isopropyl Alcohol and Cotton Swabs


  • Unplug and power off your controller. This is non-negotiable. You don’t want any power running through the device while you’re cleaning it.
  •  
  • Dip a cotton swab in isopropyl alcohol. Don’t soak it—just dampen the tip. Too much liquid can seep into the controller and cause issues.
  •  
  • Gently clean around the buttons, joysticks, and seams. Use the swab to wipe away grime, focusing on areas where dirt and oils build up. If you hit a stubborn spot, a toothpick can help loosen it before you go back in with the swab.
  •  
  • Wipe down the exterior with a microfiber cloth lightly dampened with alcohol. This helps remove smudges and gives the controller a once-over without leaving lint behind.
  •  
  • Let the controller air dry completely before using it again. Isopropyl alcohol dries quickly, but give it a few minutes to be sure everything is dry and residue-free.


Tips for a Smoother Clean


  • Work in a well-ventilated area. Isopropyl alcohol has a strong smell, and good airflow helps it evaporate faster.
  •  
  • Don’t use too much pressure. Game controllers have delicate parts, so be gentle, especially around buttons and joysticks.
  •  
  • Avoid getting liquid inside the controller. The goal is to clean the surface and crevices, not to flood the internals.


Limited Deep Cleaning

This method only cleans surface grime and can’t reach internal components or stubborn debris, leaving deeper dirt and sticky residues untouched, which may cause persistent issues with the controller’s performance.

Compressed Air and Soft Brush

Use a can of compressed air to blow dust and debris from the crevices of your game controller. Gently brush around buttons and seams with a soft brush to dislodge stubborn particles. This method safely removes dirt without damaging sensitive components.

Title


Compressed Air and Soft Brush: How to Clean Game Controllers


  • Start by unplugging or turning off your controller. This isn’t just about being careful—it keeps you from accidentally pressing buttons and sending your character running off a cliff while you clean.
  •  

  • Hold the controller upside down and gently shake it. This helps dislodge any loose crumbs, dust, or mystery gunk that’s hiding in the crevices. You’d be surprised what can fall out.
  •  

  • Use a can of compressed air to blow out debris from tight spots. Focus on the seams, around the buttons, and especially the analog sticks. Short bursts work best—hold the can upright and keep the nozzle a few inches away to avoid moisture buildup. (Compressed air is just air under pressure, not a cleaning chemical, but always follow the instructions on the can.)
  •  

  • Grab a soft-bristled brush—think a clean, dry paintbrush or a makeup brush. Gently sweep around the buttons, triggers, and D-pad. The bristles can reach into nooks where a cloth can’t. If you see stubborn dust, use the brush in combination with more compressed air.
  •  

  • Wipe down the exterior with a dry microfiber cloth. This picks up any dust you’ve loosened and gives the controller a quick refresh. Microfiber is great because it grabs onto particles instead of just moving them around.
  •  

  • Inspect your work under good light. If you spot any remaining debris, repeat the air and brush steps as needed. Don’t forget the charging port and headphone jack—these can collect dust that affects performance.


Hidden Residue Remains

Using compressed air and a soft brush may not fully remove dirt or debris trapped deep inside the controller, leaving hidden residue that can affect performance or cause issues over time.

White Vinegar and Microfiber Cloth

Dampen a microfiber cloth with equal parts white vinegar and water. Gently wipe down the game controller, focusing on buttons and crevices. This natural solution removes grime and disinfects without damaging electronics.

Title


How to Clean Game Controllers with White Vinegar and a Microfiber Cloth


  • Unplug and power down your controller. Before you start, make sure your controller is turned off and, if possible, remove any batteries. This keeps things safe and prevents accidental button presses.
  •  

  • Mix your cleaning solution. Combine equal parts white vinegar and water in a small bowl. This helps dilute the vinegar so it’s less likely to affect finishes or leave a strong smell.
  •  

  • Dampen (don’t soak!) your microfiber cloth. Dip a corner of the cloth into your vinegar solution, then wring it out thoroughly. The cloth should be just barely damp—too much liquid can seep into the controller and cause issues.
  •  

  • Wipe down the exterior. Gently wipe the controller’s surface, focusing on areas that get the most contact—like buttons, thumbsticks, and grips. Microfiber is great for picking up grime and dust without scratching plastic.
  •  

  • Get into the crevices. For stubborn gunk around buttons or in seams, wrap the dampened cloth around a cotton swab or toothpick. Carefully work it into tight spots, but avoid letting any liquid drip inside.
  •  

  • Dry with a clean, dry microfiber cloth. Go over the controller again to remove any leftover moisture. This helps prevent streaks and keeps the controller looking tidy.
  •  

  • Let it air out before use. Give your controller a few minutes to fully dry before plugging it back in or turning it on. This step is especially important if you’ve cleaned around buttons or ports.


Potential Corrosion Risk

Using white vinegar on game controllers can cause corrosion of internal components or metal contacts, leading to malfunction. Vinegar is acidic and may damage sensitive electronics if it seeps inside, making this DIY method risky.

Mix baking soda with a small amount of water to form a paste. Dip a soft toothbrush into the paste and gently scrub the game controller, focusing on crevices and buttons. Wipe away residue with a damp cloth for a clean, refreshed controller.

Title


Baking Soda Paste and Toothbrush: Cleaning Game Controllers


  • Unplug and Remove Batteries: Always disconnect your controller and take out any batteries before cleaning. This keeps things simple and avoids any accidental button presses or electrical issues.
  •  

  • Mix Your Paste: Combine a small amount of baking soda with just enough water to make a thick paste. You want it to be spreadable, not runny—think toothpaste, not soup.
  •  

  • Spot Test First: Dab a tiny bit of the paste on an inconspicuous area of the controller. Wait a few minutes and wipe it off to make sure it doesn’t affect the finish or color. Some plastics can be a little unpredictable.
  •  

  • Apply Paste with Toothbrush: Dip a soft-bristled toothbrush into the paste. Gently scrub around buttons, thumbsticks, and textured grips. Focus on crevices where grime likes to hide, but don’t go wild—gentle pressure is key to avoid scratching the surface.
  •  

  • Wipe Away Residue: Use a slightly damp microfiber cloth to wipe off the baking soda paste. Make sure you don’t leave any residue behind, especially near buttons or seams where it could work its way inside.
  •  

  • Dry Thoroughly: Go over the controller with a dry microfiber cloth. Double-check that no moisture is left behind, especially around buttons and charging ports.
  •  

  • Let It Air Out: Before reassembling or plugging in, let the controller sit for a bit to ensure it’s completely dry. This helps avoid any issues when you power it back up.


Delicate Component Damage

Using a baking soda paste and toothbrush can scratch or damage delicate components inside game controllers, especially buttons or circuit contacts, leading to malfunction or reduced lifespan.

vs

E-Cloth

Other Brands

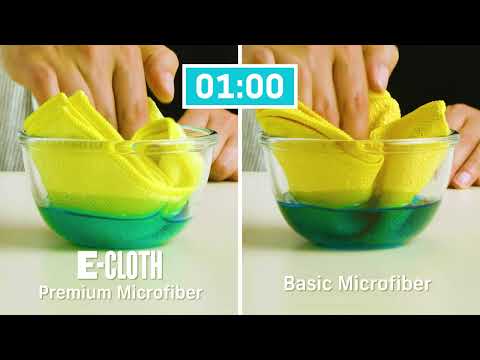
Precision-engineered, uniform microfibers

Often crushed/less consistent fibers

No streaks with just water

May need chemicals for same results

Lasts ~300 washes

Many break down faster

Traps and locks in particles

Can smear dirt around

Reduces chemicals & waste, reusable

Less eco, more waste/chemicals

Shop Now

A Clean You Can See


Our high-performance microfiber products simplify cleaning, making it quick, easy, and effective, so you can enjoy visible results without the fuss. No streaks, just results.


Shop Now

30-day money back guarantee

Experience Real Cleaning

A Clean You Can See

Blue Liquid Glass Cleaner

E-Cloth Window Cleaning Kit